Game Development Reference
In-Depth Information
Creating a New Project
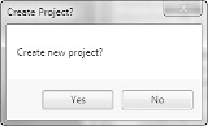
To create a new project, click on the New option, listed at the bottom of the
Project Manager. You will then be asked if you want to create a new project, as
shown in Figure 4.13. Click on Yes to create a new project.
Figure 4.13
The Realm Crafter Create Project dialog box.
Note
You can create a new project by choosing the Projects > New Project menu option at the top of the
dialog box or by clicking the New option at the bottom of the Project Manager.
Realm Crafter will begin to create a new project. This process requires a number
of files to be created and so it might take a couple of minutes. Once Realm
Crafter has created the new project, it will be listed as New Project in the
Projects tab, as shown in Figure 4.14. You can rename the project file before you
start to do something that more aptly describes your project.
Using the Project Manager Toolbox Tab
The Project Manager toolbox tab provides quick access to some key Realm
Crafter tools that you will need to use throughout your project.
These include:
n
Game Editor:
This is the standard Realm Crafter editor where you create
your MMO games.
n
Test Server (Normal):
From here, you can test your MMO server,
configure any login messages, and view any particular zones you have
created.


Search WWH ::

Custom Search