Game Development Reference
In-Depth Information
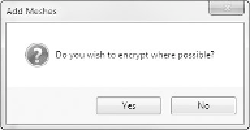
14. You will now be asked if you want to encrypt the object, as shown in
Figure 7.10. Choose Yes. This will protect the object so that it can only
be used in Realm Crafter.
Figure 7.10
Import a mesh as an encrypted object dialog box.
15. If you expand the Meshes and then the Actors folder on the Media Tree,
you will see the bear object (or navigate to the file location that you
imported). Since it was placed into its own folder, it will also have a
folder in the Media Tree. Expand that folder and click on the mesh
object to display the object in the preview window. An example is shown
in Figure 7.11.
16. Now you need to import the texture, so click on the Add Texture button,
which in this example is located in the following directory:
%System Drive%:\Program Files\Solstar Games\Realm Crafter 2\Projects
\New Project\Data\Textures\Actors\Bear
17. Select the texture and click on the Open button.
You now have to select the relevant graphic effect to apply to the image,
such as alpha channel, mask, and so on, as shown in Figure 7.12.
18. Navigate to your texture and click on it. You can now see the texture
displayed in the Preview window, as shown in Figure 7.13.
Note
The settings you select within the texture settings will depend on how you created the 3D meshes
and textures. Consult your 3D tools documentation for more information.


Search WWH ::

Custom Search