Java Reference
In-Depth Information
The “Open a Perspective” menu will be displayed.
5.
From the short cut menu, click Other . . . .
6.
In the Select Perspective window, scroll down, click Resource and then the OK button.
The Resource perspective will be opened and become the active perspective. There can be only one active
perspective at a time. For instance, notice that the Java perspective icon still appears. This means that the Java
perspective is open but not active. To make an open perspective active, simply click its icon.
There are two noticeable differences in the Resource perspective: the Outline view has moved from the right side
of the window to the lower left and the upper left pane now has the Project Explorer view.
7.
In Project Explorer, expand MyFirstProject.
The Resource perspective is simpler than the Java perspective. For instance, there are fewer functions available.
Notice that there are no tool bar buttons to create a new class or package. (Source code, however, can still be edited.)
8.
Close the Resource perspective by right clicking the Resource Perspective icon and select
Close from the short cut menu.
9.
Open the Web perspective.
Toggle back and forth between the Web and Java perspectives. Notice that the Web perspective has a lot more
tool bar buttons and different views.
Now we will prove that RAD does create the bytecode and store it in class files.
10.
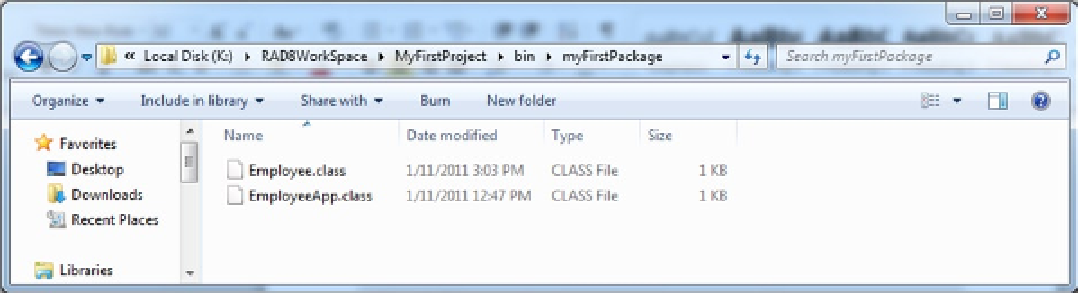
Using My Computer, display the class files by displaying the RAD workspace folder, then
the MyFirstProject, bin, and myFirstPackage folders.
If the workspace was on the K: drive and named RAD8WorkSpace, the My Computer window would look
like Figure
2-23
.
Figure 2-23.
Right click Employee.class and select
Delete
from the short cut menu.
11.
12.
In RAD run EmployeeApp.
A “no EmployeeApp class in myFirstPackage” message will be displayed. This is very true because we just deleted
it in step 11. We can force RAD to generate the bytecode by resaving the source code. However, if we display either
class's source code, neither the floppy disk button or the Save option (in the File menu) will be active. This is because
there are no changes in the source code to be saved. An easy way to get around this is to make a simple change.
13.
Display the Employee.java source code, insert a space anywhere and then delete the space.
14.
Save the Employee.java source code.