Java Reference
In-Depth Information
3.
At the New Folder frame, specify c9 as the folder name and click the Finish button.
With the folder c9 still selected, click
File
,
New
, and then
Web Page
.
4.
5.
At the New Web Page frame, expand the Basic Templates item, and select JSP.
6.
Specify HowdyJSP for the file name and click the Finish button.
The JSP file will be created and an edit session will be started. Notice that the initial page is the same as when
creating a Web page and, like the Web page, the JSP can be modified from either the Design or Source views.
7.
In the Design view, type: Howdy from the JSP!
8.
Click before the “H” in “Howdy” to position the cursor before the text.
Click
JSP
, and then
InsertScriptlet
.
9.
A scriptlet icon (a scroll) will be inserted before Howdy.
In the Design view, embedded Java statements are specified in the scriptlet's Properties view. In this case,
we will insert a
for
loop so that the text is displayed five times. We will need one scriptlet before the text (containing
the beginning of the
for
loop) and one scriptlet after the text (to finish the
for
loop).
10.
In the Properties view, enter the following in the jsp:scriptlet: input area:
for (int i = 0; i < 5; i++) {
11.
In the Design view, click after the text to position the cursor at the end of the line.
Click
JSP
and then
InsertScriptlet
.
12.
13.
In the jsp:scriptlet input area, enter an ending brace (}) to finish the
for
loop.
14.
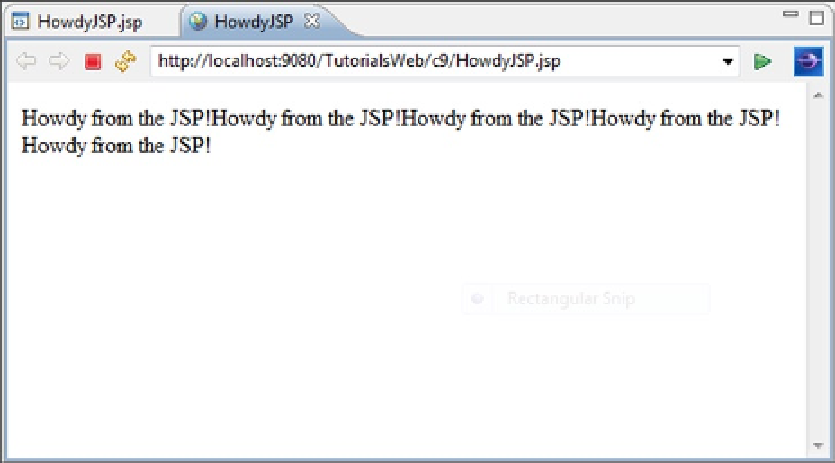
Save the source and run HowdyJSP on the server.
The result should look like Figure
9-1
.
Figure 9-1.