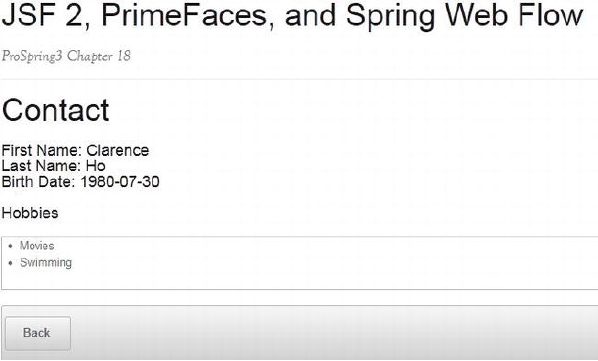
Figure 18-16. The show contact view
Implement the Add Contact Flow
Having the contact list view and show contact view ready, we can proceed to implement the add contact
flow. In the following sections, we will discuss the implementation of the views in the add contact flow.
Step 1: Enter Basic Information
The add contact flow will be started when the user clicks the Add Contact button in the list contact view.
The first state is step 1, in which the user will enter the basic information of a contact, including the first
name, last name, and date of birth.
Take a look on the code snippet in Listing 18-14, which was extracted from the start state in the flow
definition in Listing 18-5 (flow.xml).
Listing 18-14. Navigate from List Contact to Step 1 of Add Contact
<view-state id="start" view="list.xhtml">
<on-entry>
<evaluate expression="contactController.newContactListBean()"
result="viewScope.contactListBean"/>
</on-entry>
<transition on="view" to="show">
<set name="requestScope.contactId" value="contactListBean.selectedContact.id"/>
</transition>
<transition on="add" to="add-step-1">
<evaluate expression="contactController.newContactBean()"
result="flowScope.contactBean"/>
</transition>
</view-state>
Search WWH :