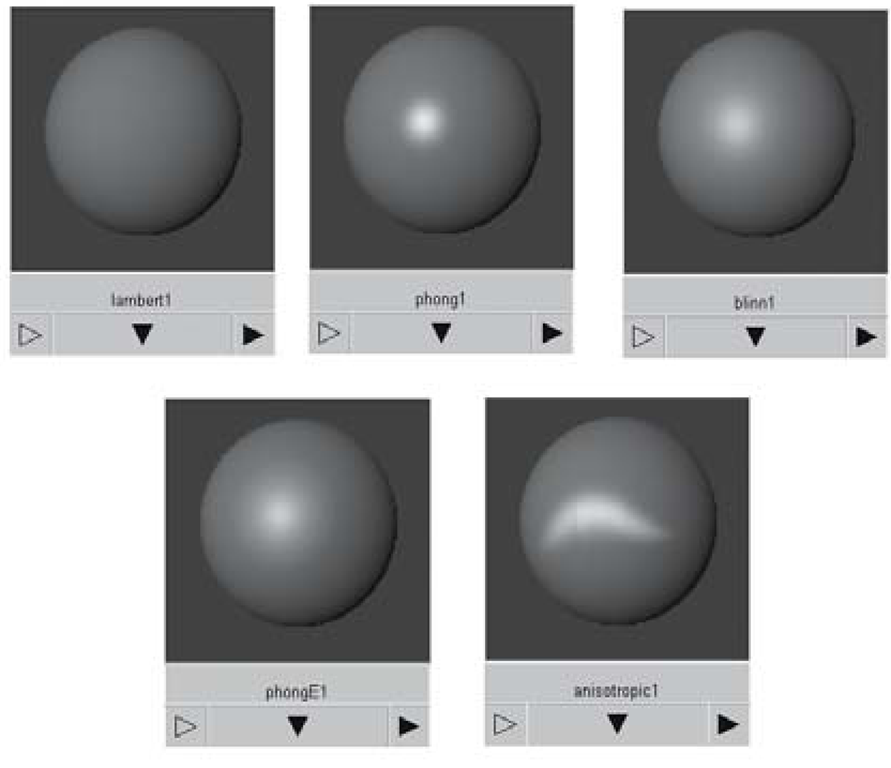
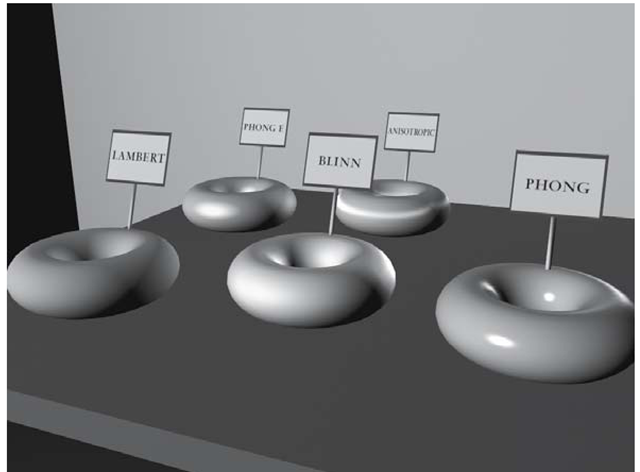
The major material types differ fundamentally in the way they handle specularity. Specularity helps define shininess, glossiness, or highlighting. Look at the different materials in Color Plates XI and XII.
The mathematical algorithms used to process this specularity give the material types their names. (They are generally named after the computer graphics researcher who developed the algorithm.) Here is a guide to Maya’s major material types (see Figure 2.32), and how you can control their specular settings.
Lambert: This material type has a dull or matte finish. It has no specular attributes.
Phong: A shiny, plastic-like quality defines this material type. Cosine Power values broaden or tighten the size of the highlights.
Blinn: This is often used for metallic surfaces. The Eccentricity value varies the size of highlights.
PhongE: Similar to Phong, but with an increased ability to create soft highlights. Highlight Size controls, you guessed it, highlight size! Roughness allows you to vary the highlight’s fade from center outward.
Figure 2.32: Material types
Anisotropic: Special-use material type for directional highlights. This material type allows you to specify a directional highlight, such as brushed metal, hair, tightly woven fabric, vinyl records, etc. Angle controls the direction of the highlight (caused by micro-grooves in the surface you are simulating). Spread X and Spread Y change the size of the highlight. Roughness allows you to fade the highlight, much as in the PhongE material.
Shading Exercise — Material Types
1. Set your project to understanding_maya\Chapter02\shading_material_types_donuts.
2. Open the scene shading_material_types_donuts_begin.ma.
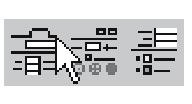
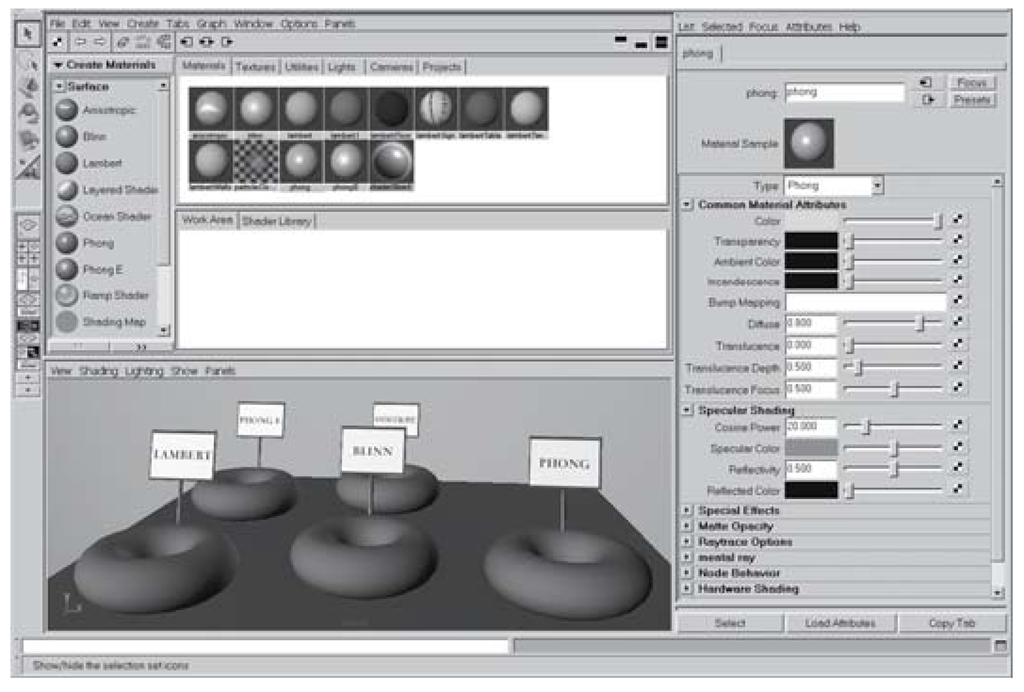
3. You are going to create a new material for each doughnut. When working on the shading of a scene it is helpful to configure the interface with a perspective view panel, the Hypershade, and an Attribute Editor. One way to set this up is by selecting the Quick View button under the Tool Box called Hypershade/Persp. Then, click the Show or hide the Attribute Editor button in the Status Line. This is also called “docking” the Attribute Editor, since it is no longer a floating window (see Figures 2.33 and 2.34).
Figure 2.33: Docking button
Figure 2.34: Shading layout
4. Now create five new materials by clicking in the Hypershade’s menu on Create > Materials > Lambert, followed by Blinn, Phong, PhongE, and Anisotropic.
5. Assign each material to the appropriately labeled doughnut. (Remember that you can MMB-drag materials onto objects.)
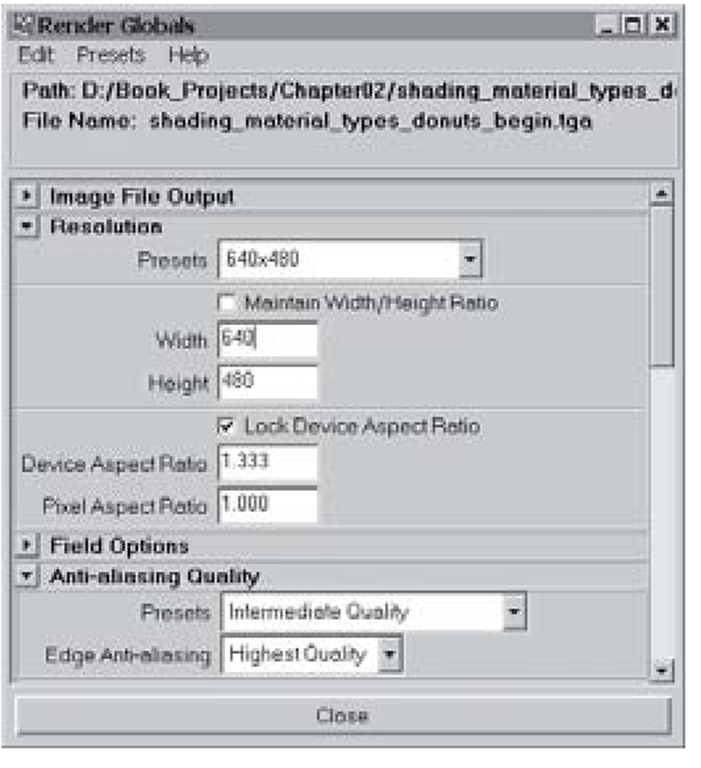
6. Most material attributes cannot be accurately judged through interactive shaded mode. To see the results of your shading efforts, you’ll need to render the current frame. First, click on the Render Globals button on the Status Line. Choose the Resolution preset of 640×480, and set the Anti-aliasing Quality preset to Intermediate (see Figure 2.35). Close the Render Globals window, and then click the Render the current frame button. Take a look at the different specularity types the materials provide (see Figure 2.36).
7. You can create wildly different results by varying the specularity settings of the different materials. Try these settings and then re-render the frame to compare.
a. Blinn: Eccentricity: 0.6, Specular Roll Off: 0.5.
b. Phong: Cosine Power: 60, Specular Color: White.
c. PhongE: Roughness: 0.8, Highlight Size: 0.4.
d. Anisotropic: SpreadX: 10, SpreadY: 1.75, Roughness: 0.85, Specular Color: White.
Figure 2.35: Render globals
8. Save the scene as shading_material_types_donuts_end.ma.
Figure 2.36: Rendered material types
