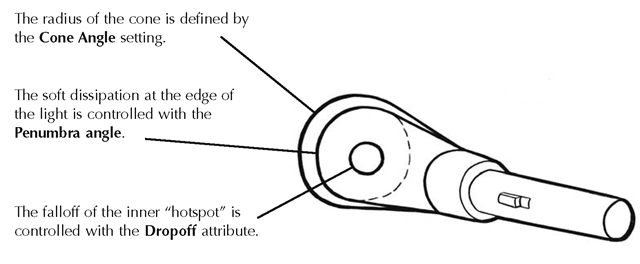
The spotlight radiates light from a single point toward a target in a cone-like fashion, much as does a flashlight (see Figure 2.37). The controls are also more complex than those found on a point light, because Maya allows you to specify things like the angle of the cone of light and the way in which light dissipates. Let’s look at a few of the parameters of the spotlight.
Figure 2.37: Spotlight attributes
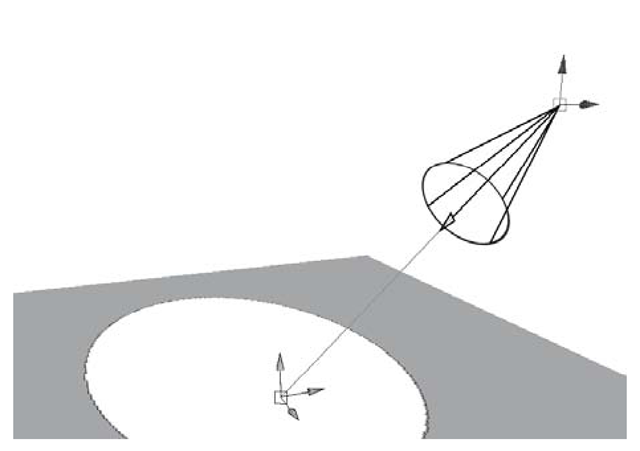
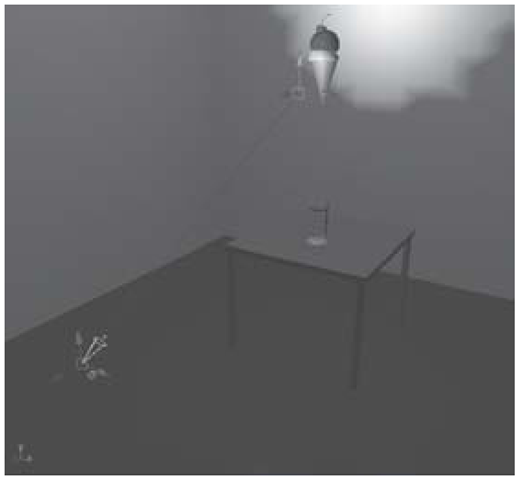
The spotlight node is the where the body of the light is. The target node is the point at which the spotlight is aimed. By using the Show Manipulator Tool, or the t hotkey, you can access this extra node. Wherever the target is, the spotlight points (see Figure 2.38).
Figure 2.38: Spotlight and aim
Lighting Exercise — Spotlight
1. Set your project to understanding_maya\Chapter02\lighting_spotlight.
2. Open the scene lighting_spotlight_icecream_begin.ma.
3. Yep, it’s the familiar room with an ice cream cone on the table. Currently there is a general illumination in the scene. One way to check the lighting is to select shaded mode and hardware lighting mode for the perspective panel. With the perspective panel active, press 5 and then 7 on your keyboard.
4. Add a spotlight to the room by clicking Create > Lights > Spotlight. You should see the back wall light up where the light is aimed.
5. Switch to the Move Tool, and place the light 12 units up on the Y-axis and 20 units on the Z-axis. You’ll notice the area of illumination on the wall changes as you move the light.
6. The back wall has a moderate number of subdivisions in it. This is necessary if you want to see the effects of your lighting in the shaded view panels. However, there are limitations to what the hardware lighting mode will display. For a better idea of what your lights look like, go ahead and render a frame. Click on the Render the current frame button in the Status Line.
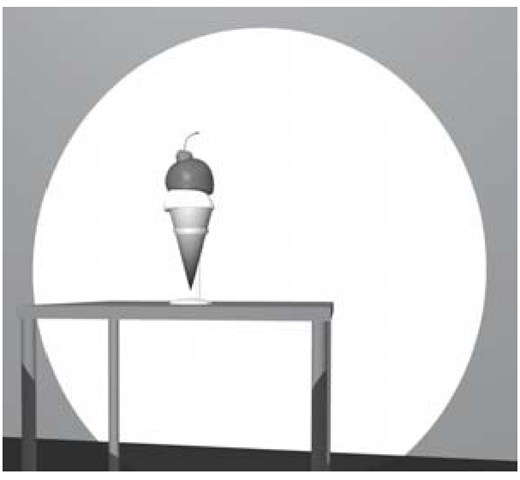
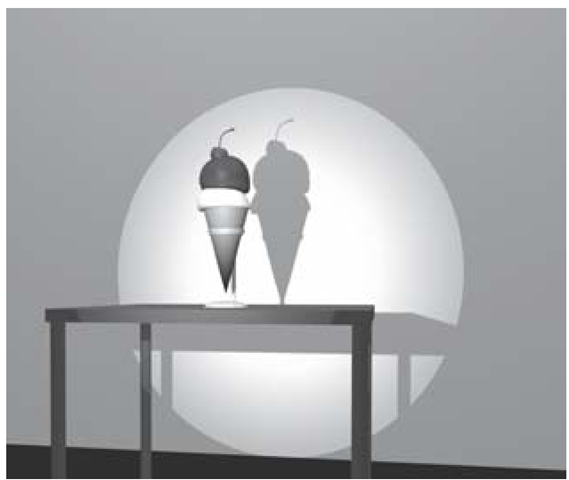
7. You’ll notice that your spotlight casts a bright circle of light and currently casts no shadows (see Figure 2.39). Since shadow casting in Maya is a function of your lights, we’ll use the Attribute Editor to turn on the spotLight1 shadows.
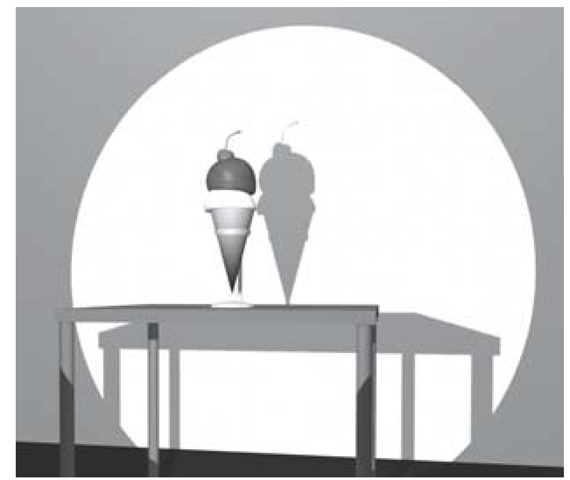
8. With spotLight1 selected, click Ctrl-a to open the Attribute Editor. Open the Shadows turn-down menu, and then check the box next to Use Depth Map Shadows (see Figure 2.40). Re-render the frame (see Figure 2.41).
Figure 2.39: Default spotlight
9. When the light moved away from the wall, its circle became bigger. Another way to control how much area is covered by the light is the Cone Angle. This attribute alters the shape of the spotlight cone. A wide angle covers a greater area, while a narrow angle focuses the beam more tightly. In the Attribute Editor change the spotLightShape1‘s Cone Angle to 20°, and re-render the frame (see Figure 2.42).
10. Try widening the Cone Angle to 80° and render the frame. This now encompasses the side walls, too. This is wider than we need, so reduce the Cone Angle down to 30°.
11. You may have noticed that the circle of light is uniformly bright from its center outward. Most light sources diminish as they radiate out from their centers. This is described as the Dropoff of a light. The default dropoff value for the Maya spotlight is 0; in the Attribute Editor increase the Dropoff to 40°, then render the frame (see Figure 2.43).
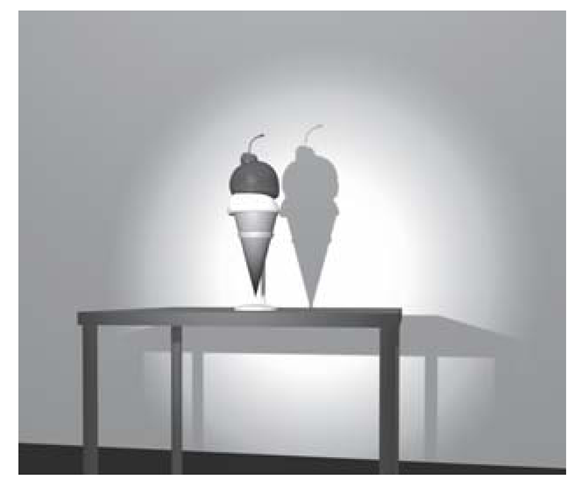
12. This looks better, but the edge of the light is still too hard. The Penumbra Angle controls how hard or soft the edge of the light is. Increase the Penumbra Angle to 4°. Now, when you re-render the frame you’ll have a much more pleasing, realistic light (see Figure 2.44).
Figure 2.40: Shadow attributes
13. If you need to aim the spotlight precisely, it can be difficult to simply rotate it with the Rotate Tool. Try this: move the time slider to frame 30 — the ice cream cone has leapt into the air — and now aim the spotlight at the cone using the Rotate Tool. Translate the spotlight to the left, about -15 units on the X-axis. The aim is off, and the cone has been plunged into darkness! You must now rotate the light again to re-aim it. There is a simpler way: the Manipulator Tool (see Figure 2.45).
Figure 2.41: Shadow render
Figure 2.42: Cone angle of 20°
Figure 2.43: Dropoff angle of 40°
Figure 2.44: Penumbra angle of 4°
14. With the spotLight1 still selected, choose the Show Manipulator Tool icon from the Tool box. Two manipulators appear: one that controls the body of the light, and one that controls the aim of the light. If you move the body, its rotation will automatically change to remain aimed at its target manipulator. By moving the aim manipulator, you are controlling the spotlight’s rotation in an intuitive manner.
15. Now, try to animate the light so that it follows the ice cream cone’s acrobatic antics. Notice that only the spotLight1’s transform node Translation and Rotation channels are changing when you move the manipulators. So, to keyframe the follow spot, go to frame 15, place the aim manipulator right on the ice cream cone, and set a keyframe for all three rotation channels.
Figure 2.45: Target manipulator
16. Advance to frame 30, move the spotlight’s aim manipulator up to the ice cream cone, and set a keyframe on the rotation axes.
17. Repeat this process for frame 40, to illuminate the landing. You can also try to aim the light at the cone during the remaining two leaps it makes. Save the scene when you’re done.
