Lighting Exercise — Barn Gobo
1. Set your project to understanding_maya\Chapter03\lighting_barn_gobos.
2. Open the scene lighting_barn_gobo_begin.ma.
3. Activate the Camera1 view panel and then open the Render Globals.
4. Set the Resolution preset to 640 x 480, and then set the Anti-aliasing Quality preset to Intermediate. (You may want to choose Production quality settings at the later stages of lighting setup, but Intermediate settings can be a real time saver in the beginning, allowing you to try more variations in a given time period.)
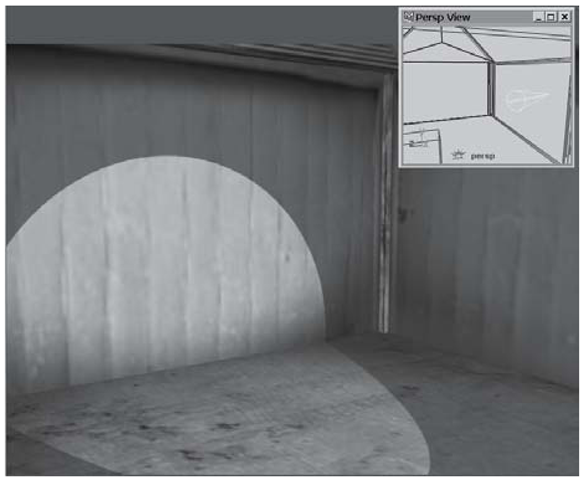
5. Close the Render Globals and then render a single frame through the Camera 1 panel by clicking the Render the current frame button on the status line. You’ll see the barn interior lit with a very obvious spotlight (see Figure 3.93). Unless there’s a group of clever kids putting on a summer play in the hayloft, this looks a bit unnatural. We’ll be adding a realistic windowpane shadow to break up the spotlight. (In much the same way those kids would have if they got their hands on a gobo or cookie — a sheet of metal with a pattern cut into it used for this very purpose in theatrical lighting.)
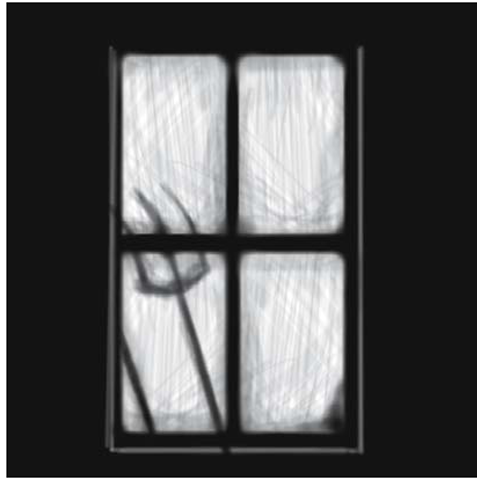
6. The spotlight has been positioned to cast light and shadow as if it were coming through a small window in the upper part of the barn. Perhaps this is a second-level storage area, with a pitchfork and other tools leaning against the window. To suggest all of these things without building models and casting true shadows, a texture map has been painted. Using fcheck, open up the image file in your project’s sourceimages folder named gobo_dirtyWindow.bmp. This is an 8-bit, grayscale map that will block light in the black areas (see Figure 3.94).
Figure 3.93: Normal spotlight throw pattern
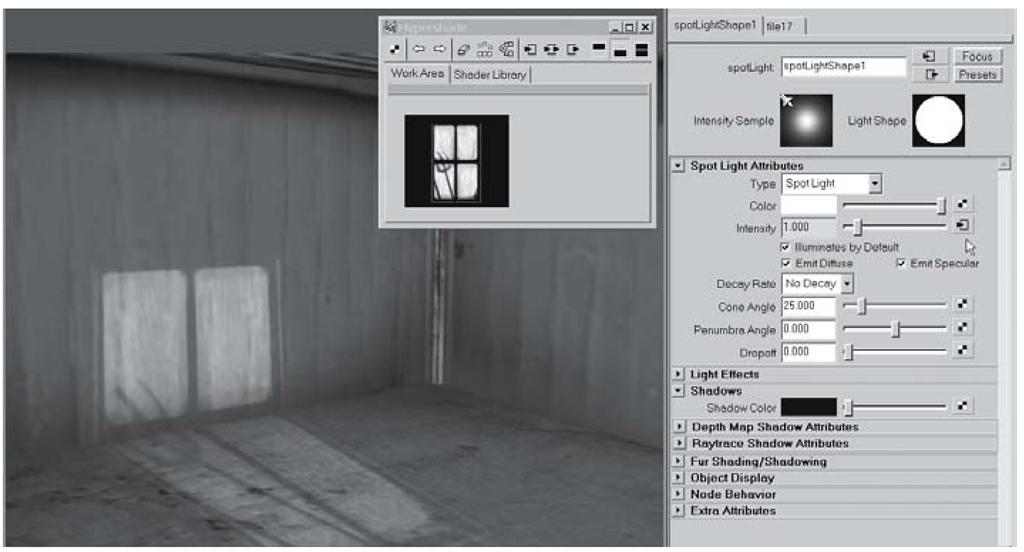
7. Close fcheck and return to Maya. Select the spotLight1 and open the Attribute Editor. Currently, the Intensity of the light is set to a uniform value of 1. Click on the Create Render Node button to the right of the Intensity slider. In the Textures tab of the Create Render Node window, make sure that the Normal radio button is checked right under the 2D Textures dropdown arrow. Click the File texture button. This maps an empty File texture node to the Intensity of the spotlight.
Figure 3.94: Gobo file
Figure 3.95: Spotlight with gobo
8. In the Attribute Editor, click the folder icon to the right of the Image Name slot. Select the gobo_dirtyWindow.bmp file and then click the Open button. In effect, this places the gobo in front of the spotlight’s beam. The gobo will now block light in the black areas, and allow it through where it is white. The grayscale image affords us 256 values from black to white.
9. Activate the Camera 1 view panel and render a frame. You’ll see that the circle of light is gone; it has been replaced by the more realistic window cutout (see Figure 3.95). (To add more tools to your shadow area, you could try painting different objects into the bitmap, and then reload the file texture.)
10. If you look closely, there are some unattractive edge artifacts along the windowpane shadows. These are caused by the Intermediate level Anti-aliasing Quality setting we chose in the Render Globals. You can set this preset to Production quality in order to soften the jagged edges. Then re-render the frame.
11. Save your scene as lighting_barn_gobo_end.ma.


