Animation Exercise — Pivot Points
1. Set your project to understanding_maya\Chapter02\animation_pivot_wagon.
2. Open the scene animation_wagon_pivots_begin.ma.
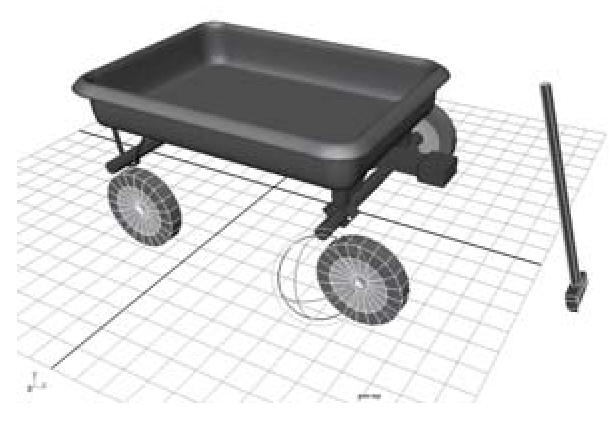
3. You’ll see a little red wagon, made up of a number of parts, such as the body, wheels, handle, yoke, and axle. Try selecting and rotating each part. You will find that the pivot points are not placed correctly, therefore the rotations are incorrect (see Figure 2.27). Be sure to undo any rotations when you are done.
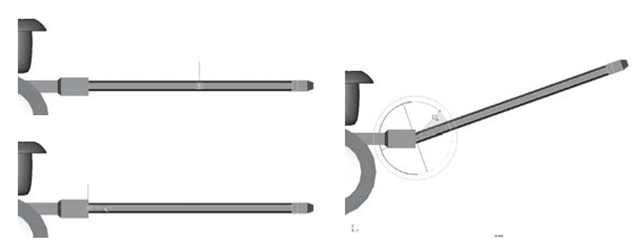
4. Use the Insert key to edit the pivot points of each object. Start with the handle. It needs to be able to rotate up and down on its Z-axis. By using the front view panel, align the pivot point of the handle object to the very end where it intersects the yoke. Hit Insert when you are done. Switch to the Rotate Tool and try out the handle. It now works much better (see Figure 2.28).
5. The yoke object currently rotates around its pivot point at the world origin. This breaks the entire steering assembly. Instead, the pivot should be moved to the high point of the yoke, where it is nearly touching the underside of the wagon body. Hit Insert and reposition it there. When done, press Insert again to return to the Rotate Tool and try rotating on the Y-axis. The yoke now pivots properly (see Figure 2.29). You may have noticed that the different parts of the wagon aren’t yet interacting. For example, the yoke rotation has no effect on the position of the front axle, wheels, or handle.
Figure 2.27: Bad pivot points
Figure 2.28: Correcting the handle pivot point
The wheel rotations need to be fixed with a bit more precision than did the handle and yoke. It would be very apparent if the wheels didn’t rotate around their exact center — they’d wobble. To place the pivot point correctly, we’ll use the Snap to points option. This will allow us to swap the pivot point to the vertex at the wheel’s hub.
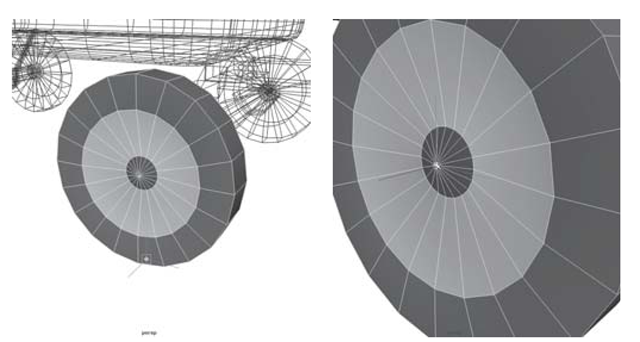
6. Select the wheel_FrontRight object. Press Insert to switch to pivot point editing mode. Next, click the Snap to points button on the Status Line, or hold the V key on the keyboard, to invoke point snapping. Hover the cursor over the vertex at the red hub center. Now, MMB-click the vertex. This will make the pivot point jump to that position (see Figure 2.30).
7. Press Insert to return to the Rotate Tool. The wheel now spins properly.
8. Repeat this for each wheel. You may also use the LMB-click-drag along with the Snap to points option to drag the pivot point to the hub. Just be careful to drag from the Move Tool’s center, not on a single axis.
Figure 2.29: Correcting the yoke pivot point
9. All that’s left now are the axles. Unfortunately, they lack a good central vertex for point snapping. Instead, we will use Maya’s automatic pivot centering command.
Figure 2.30: Vertex snapping the wheel’s pivot point
This works because the geometric center of the object is in the same location as our desired rotational pivot.
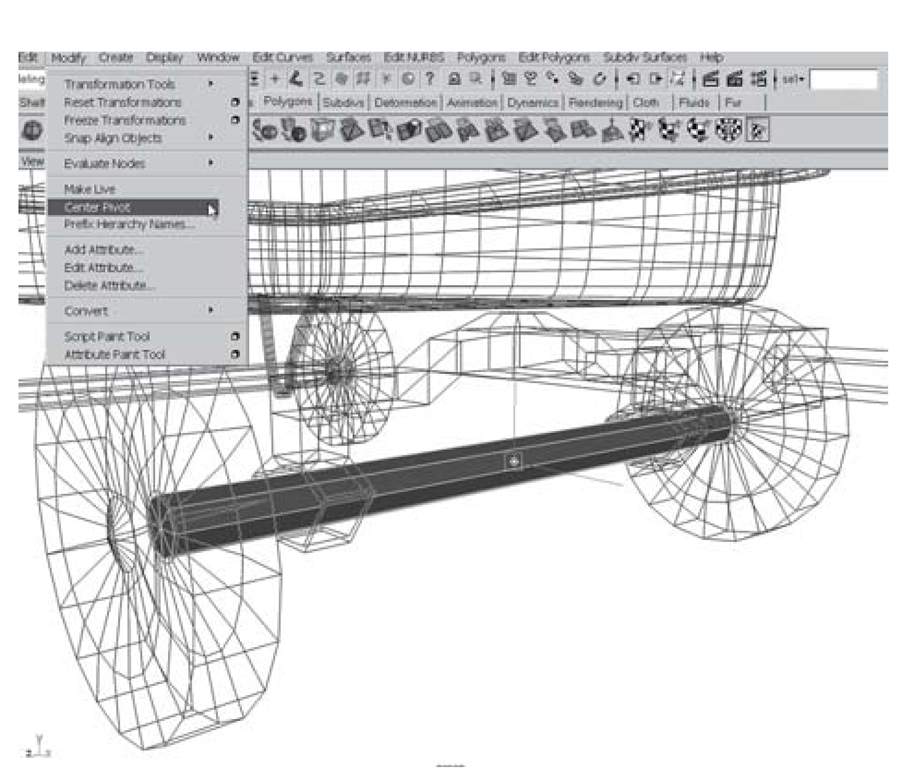
10. Select the axle_front object. Click Modify > Center Pivot (see Figure 2.31). Now, use the Rotate Tool and spin the axle_front object around its Z-axis to test it.
11. Repeat this for the axle_rear object. Now, when you rotate any of the movable parts of the wagon, there are no unnatural pivot points.
12. Save your scene as animation_wagon_pivots.ma.
Figure 2.31: Centering the axle pivot point


